PZ-EZPZ1 PowerPoint Telestrator
Share It
PlayZone HD PZ-EZPZ1 whilst providing the most commonly used annotation tools has the added benefit of a truly portable device, this Telestrator is small enough to fit inside a shirt pocket, it is very easy to use as it does not have any interface menu’s or buttons and can be setup very quickly for any meeting or event.

Method 1
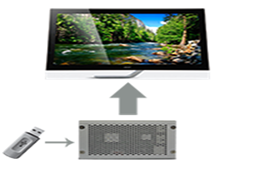
With this setup you can use your PowerPoint show saved as individual slide images to be loaded into Play Zone HD via a USB Thumb Drive. With this setup, the PPT show is saved as images, which means that the slides will not have any animations or effects or links to videos or applications, if you need to use these elements then refer to method 2.
How it works
Save the PPT show as picture images from PowerPoint;
PPT menu>File Save As>from drop down box choose JPEG and select a folder>select Every Slide
This will then save your PPT show as JPEG images, copy the slides onto a USB thumb drive to play into Play Zone HD, there is one more step you have to do before you can work with the images and Play Zone HD, that is you have to create a Play List so that Play Zone HD knows which images and slide order to use.
To create a Play Zone HD playlist is simple, the Play List should only be made or edited using Notepad++ application which can be freely downloaded from here.
Do not use the standard Notepad windows application or word, since both of these insert hidden characters into the play list file which Play Zone HD will not be able to make any sense of and the play list will not work as intended.
The Play List file simply lists the images and which order they should be displayed in:
[PlayListItem_0]
name=ImageFile
path=Slide1.jpg
[PlayListItem_1]
name=ImageFile
path=Slide2.jpg
The Play List file should be named as PlayZoneHD.ini and should be located on the USB Thumb drive along with all of the slide images.
Power up the Play Zone HD Telestrator and then connect the USB drive to one of the 4 available ports and the first image in the playlist will automatically be displayed.
To go forwards and backwards for slide show, simply attach a USB keyboard to the Play Zone HD and press either Enter key to move forwards or Backspace key to go backwards.
You can use the optional Play Zone HD IR remote controller for wireless operation, the remote control provides additional functions that allow colour and size changes to be made on the drawing tools, which can also be achieved using the keyboard.
The Play List can also contain Video’s and streaming video URLs as part of the list, so if you have a particular video to play at certain times of the show you can easily add this into the playlist.
The Play Zone HD Telestrator is normally interfaced to a HDMI and USB touch screen display, by using a 1 in 2 out HDMI splitter you can also have a second monitor / projector display the output.
The standard Telestrator tools which include Freehand Draw, Circle, Spotlight and Stretchy Arrows are located in the four corners & middle top of the Touch screen, simply tap the corner and use the tool. An all clear function is located in the bottom left corner, tap this to clear all drawn elements from the screen.
Method 2
Using this setup, you can run your PowerPoint show with all animations and multimedia content on an external computer / tablet / laptop with HDMI out and feed the output into the Play Zone HD via the optional Play Zone HD HDMI capture module.
This method has the added benefit of allowing you to run any application on the external computer and being able to annotate over its output.
With this setup the Play Zone HD play list can contain just a single entry for the capture device:
[PlayListItem_0]
name=CaptureDevice
video_fifo=25
threshold=5